1. Pillow Case: Sausage Style
2. Heart Potholder
3. Burlap & Lace Table Runner
1) PILLOW CASE TUTORIAL: Sausage Style
Sew, here is my rendition of a pillowcase, sausage style. (I prefer the sausage style, because all the inside seams are bound, and neatly sewn shut, which make a prettier finished project.) In less than an hour, you can cut and sew together a gift for someone special....maybe even one for yourself!
You need 3 fabrics. Cut to size as follows:
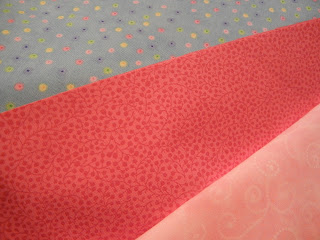
For the Body of the pillow case: 27" x 45" (I used the light blue poke-a-dot)
For the Cuff: 12" x 45" (I used the light pink)
For the Accent Strip: 2" x 45" (I used the dark pink)
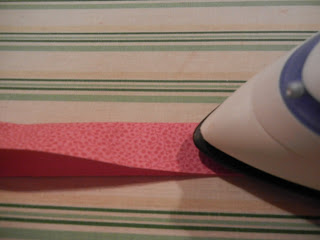
Take the Accent Strip, and fold in half, wrong sides together and press.
To construct the pillow case, place the Cuff right side up and flat on the table (which is my light pink).
Place the Body (which is my light blue) right side up and flat along the length of the Cuff.
Take the folded Accent Strip (which is my dark pink -folded in half) and place it on top and along the 45" of the Body.
Roll the Body up near the Accent Strip.
Bring up the edge of the Cuff and pin all raw edges together.
Sew your roll should look like this....
Using a 1/4" seam allowance, stitch along the entire raw edge while removing your pins as you sew. Make sure all layers are sewn together.
Turn the "sausage roll" right side out.
Line up the "case" wrong sides together and make sure your Accent Strip is aligned on both sides so your side seams match. Stitch along the end and one side with a 1/8" seam.
Turn your case wrong side out, press flat, and stitch a 1/4" seam (this is also known as a french seam).
Turn right side out and press. There should be no raw seams on the inside of your finished pillow case.
Congratulations! You did it! Now stand back and admire your work. Oh...don't forget to take a picture; and
don't forget to Show and Tell!
* * *
* * *
* * *
2) HEART POT HOLDER TUTORIAL
HEART POT HOLDER TUTORIAL

Materials:
4 fat quarters of quilting cotton
quilt batting (such as Warm & Natural)
Insul-Bright batting
Red felt or wool
1. Cut the fabrics, as follows:
- 2 hearts from Fabric 1 for the front of the pot holder (Red floral fabric, shown below)
- 1 heart in Fabric 2 for the lining of the pot holder (Tan fabric, shown below)
- 1 heart in Fabric 3 for the back of the pot holder (Large print floral print on tan fabric)
- 2 hearts in quilt batting. Cut one of these hearts in half as pictured below
- 1 heart in Insult-Bright batting
Using the small heart template, cut
- 1 heart in red (or pink) felt or wool
Cut two rectangles, measuring 2 1/4 x 8 inches from Fabric 4 (red fabric) for the binding on the front of the pot holder.

2. Press the two red floral hearts in half with the wrong sides facing together. Place a piece of batting inside each red heart (using the batting heart that has been cut in half).
To create a binding strip, press the fabric rectangles in half lengthwise. Unfold, and fold the edges into the center, and press. Fold in half so that you have a binding strip that measures 8 inches by 9/16 inch.

Pin the binding strip to the inside edges of the red hearts and stitch in place. Trim the ends of the binding strip flush with the heart formation.
Pin the felt (or wool) heart in position. Blanket stitch the heart in place.
3. Position the red hearts on top of the pot holder lining (tan) and pin in place. Stitch around the outside of the pot holder using a basting stitch and a scant seam allowance. Press.
4. Trace the quilting pattern (i.e. 2 heart shapes) onto the back of the pot holder using a water soluble or heat soluble pen. Pin the back of the pot hold to the Insul-Bright and batting hearts.
Quilt the heart design on the pot holder back. Remove the soluble pen markings. Baste around the outside of the backing with a scant seam allowance only to hold the three layers (i.e. backing, batting and Insul-Bright) in place.

5. Pin the pot holder back and front together with the right sides facing. Stitch around the outside of the pot holder leaving a 3 inch gap one side (preferably not on the curve) for turning. Clip curves.
Turn the pot holder out the right way through the opening. Machine or hand stitch the opening closed. Press.
6. Top stitch around the outside of the pot holder using a 1/4 inch seam allowance. Press.
The heart pot holder pattern is suitable for beginner sewers and can be made in less than 2 hours.
* * *
* * *
* * *
3) BURLAP & LACE TABLE RUNNER
Supplies: (for a finished size of 16" x 48")
1 1/2 yards burlap, cut to 16" x length of table plus six inches (I made my table runner for my dining room table which measured 16" wide by 48" long).
3 1/2 yards white lace
2 pkgs (3 yds. each) of 1/2 inch wide white double folded bias tape
Zigzag stitch, or serge both ends of the burlap runner. This will stop any fraying and unraveling.
Lay the burlap runner on a flat surface. Align lace to one side of the length of the runner.
Position the edge of the burlap and lace into the fold of the bias tape, and pin in place. Sew bias tape (with the burlap and lace sandwiched in place) approximately 1/8" from the inside edge of the bias tape. Repeat process for other side (length) of the burlap runner.
Please note that there is no lace placed on either ends of the runner.
Trim the lace and bias tape to be flush with the end of the burlap runner. Your done!
Its a simple, quick and cheap table runner perfect for any table top.


.JPG)

.JPG)

