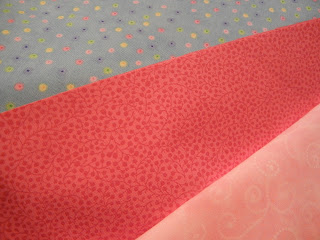
Sew, here is my rendition of a pillowcase, sausage style. (I prefer the sausage style, because all the inside seams are bound, and neatly sewn shut, which make a prettier finished project.) In less than an hour, you can cut and sew together a gift for someone special....maybe even one for yourself!
You need 3 fabrics. Cut to size as follows:
For the Body of the pillow case: 27" x 45" (I used the light blue poke-a-dot)
For the Cuff: 12" x 45" (I used the light pink)
For the Accent Strip: 2" x 45" (I used the dark pink)
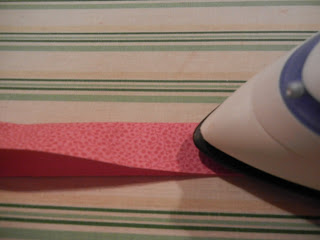
Take the Accent Strip, and fold in half, wrong sides together and press.
To construct the pillow case, place the Cuff right side up and flat on the table (which is my light pink).
Place the Body (which is my light blue) right side up and flat along the length of the Cuff.
Take the folded Accent Strip (which is my dark pink -folded in half) and place it on top and along the 45" of the Body.
Roll the Body up near the Accent Strip.
Bring up the edge of the Cuff and pin all raw edges together.
Sew your roll should look like this....
Using a 1/4" seam allowance, stitch along the entire raw edge while removing your pins as you sew. Make sure all layers are sewn together.
Turn the "sausage roll" right side out.
Press entire "case" flat, and trim edges so their flush and aligned.
Line up the "case" wrong sides together and make sure your Accent Strip is aligned on both sides so your side seams match. Stitch along the end and one side with a 1/8" seam.
Turn your case wrong side out, press flat, and stitch a 1/4" seam (this is also known as a french seam).
Turn right side out and press. There should be no raw seams on the inside of your finished pillow case.
Congradulations! You did it! Now stand back and admire your work. Oh...don't forget to take a picture; and
don't forget to Show and Tell! I'd love to see your finished project.


4 comments:
Hi,
My wife and I each made a pillow from your pattern.
We found the pattern easy to follow and are pleased with how they turned out. I took a photo to share with you but don't see where to upload it.
Thank you for the pattern.
Doug and Sharon
Sew, here is my rendition of a pillowcase, sausage style. (I prefer ... bodypillowcases20x54.blogspot.com
Nice tutorial. Very detailed and easy to follow. I'll make these for the kids.
Gretta Hewson
Veritable San Antonio Moving Company
If we have lively colored bed covers, there are tendency that we would only focus on it than the aged looking bed frames best silk pillowcase This can cut the risk of waking up with aches and pains around the neck and shoulder regions
Post a Comment